Installation
Set up the Dotclone SDK in your project, configure API keys, and integrate AI voice and chat capabilities into your application.
Prerequisites
Before installing, make sure you have:
- A Dotclone account — Sign up free
- An API key from your dashboard
- Node.js 16+ or Python 3.8+ (depending on your SDK choice)
Get Your API Key
Before you can use the SDK, you need an API key. Here's how to get one:
Navigate to API Settings
Go to Settings → API Keys in your dashboard.
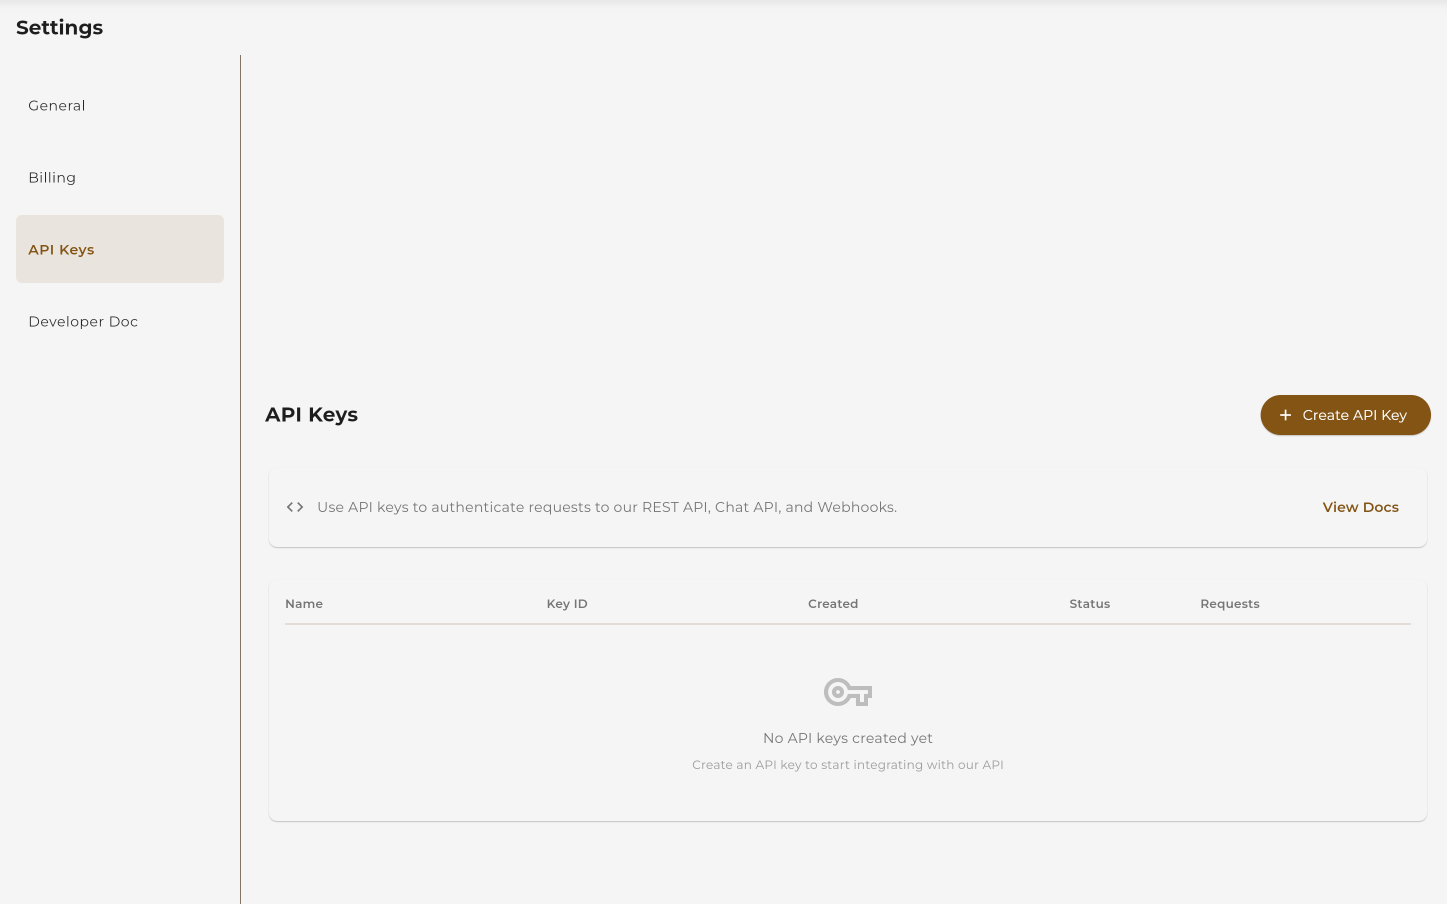 Click Settings → API Keys
Create a New API Key
Click "Create API Key" and give it a name.
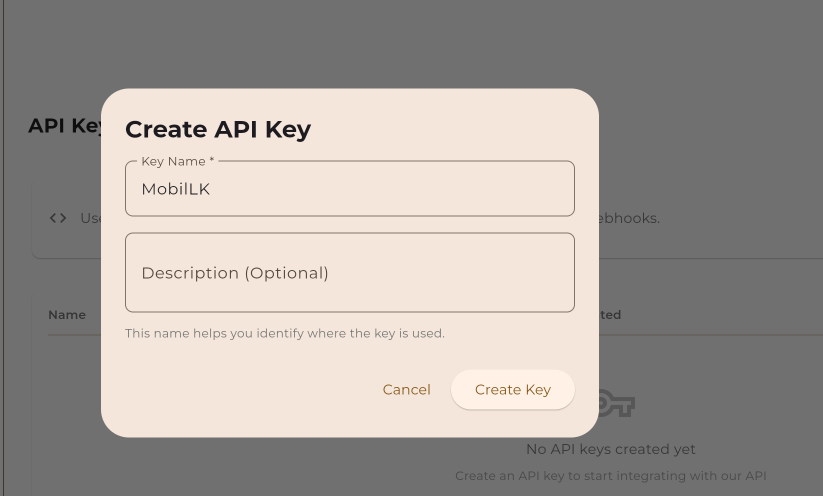 Click "Create API Key"
 Give your key a descriptive name
Copy Your API Key
Copy the key and store it securely. You won't be able to see it again.
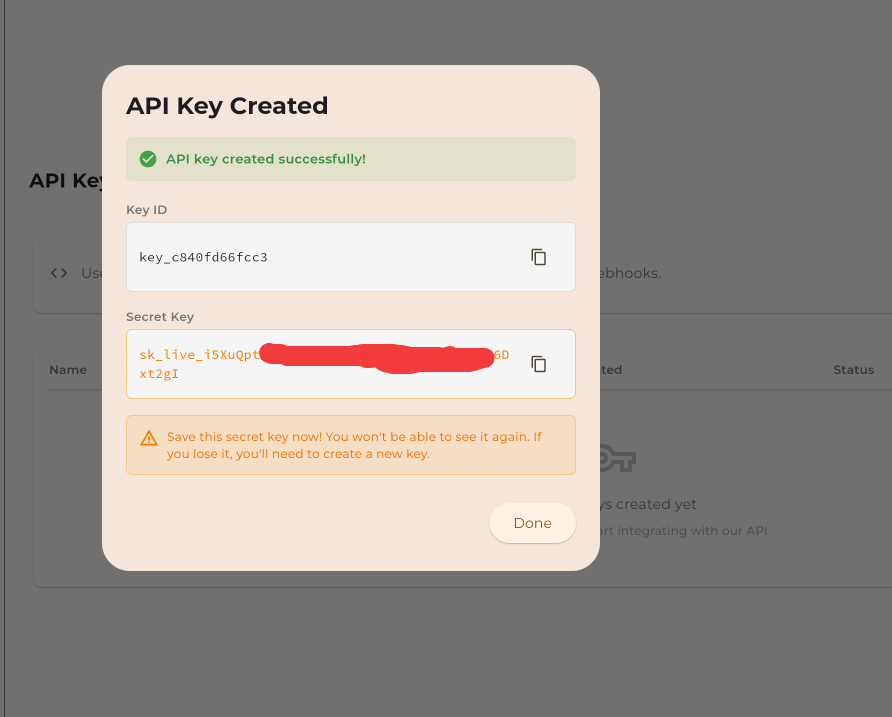 Copy your API key immediately — it won't be shown again
Install the SDK
Choose your preferred programming language and install the Dotclone SDK:
Install via pip
pip install dotcloneInitialize the Client
from dotclone import Dotclone

# Initialize with your API key
client = Dotclone(api_key="your_api_key_here")

# Or use environment variable (recommended)
# export DOTCLONE_API_KEY="your_api_key_here"
client = Dotclone()
Quick Example: Generate TTS
# Generate speech from text
audio = client.tts.generate(
    text="Hello! Welcome to Dotclone.",
    voice="emma",
    provider="elevenlabs"
)

# Save the audio file
audio.save("welcome.mp3")
Install via npm
npm install dotcloneInitialize the Client
import Dotclone from 'dotclone';

// Initialize with your API key
const client = new Dotclone({
  apiKey: 'your_api_key_here'
});

// Or use environment variable (recommended)
// DOTCLONE_API_KEY="your_api_key_here"
const client = new Dotclone();
Quick Example: Generate TTS
// Generate speech from text
const audio = await client.tts.generate({
  text: "Hello! Welcome to Dotclone.",
  voice: "emma",
  provider: "elevenlabs"
});

// Get the audio URL
console.log(audio.url);
Install via npm
npm install dotcloneInitialize the Client
const Dotclone = require('dotclone');

// Initialize with your API key
const client = new Dotclone({
  apiKey: process.env.DOTCLONE_API_KEY
});

// Make sure to set the environment variable
// export DOTCLONE_API_KEY="your_api_key_here"
Quick Example: Trigger a Call
// Make an outbound call
const call = await client.calls.create({
  to: "+1234567890",
  workflowId: "wf_abc123",
  fromNumber: "+0987654321"
});

console.log(`Call started: ${call.id}`);
Direct API Request
You can also use the REST API directly with cURL or any HTTP client:
Base URL
https://api.dotclone.com/v1Authentication
curl -X GET "https://api.dotclone.com/v1/workflows" \
  -H "Authorization: Bearer YOUR_API_KEY" \
  -H "Content-Type: application/json"
Quick Example: List Workflows
curl -X GET "https://api.dotclone.com/v1/workflows" \
  -H "Authorization: Bearer YOUR_API_KEY" \
  -H "Content-Type: application/json"
Environment Variables
We recommend using environment variables to store your API key securely. Here's how to set them up:
Linux / macOS
# Add to ~/.bashrc or ~/.zshrc
export DOTCLONE_API_KEY="your_api_key_here"

# Reload your shell
source ~/.bashrc
Windows (PowerShell)
# Set for current session
$env:DOTCLONE_API_KEY="your_api_key_here"

# Set permanently (requires admin)
[System.Environment]::SetEnvironmentVariable("DOTCLONE_API_KEY", "your_api_key_here", "User")
.env File
# Create a .env file in your project root
DOTCLONE_API_KEY=your_api_key_here

# Load with dotenv (Python)
from dotenv import load_dotenv
load_dotenv()

# Load with dotenv (Node.js)
require('dotenv').config();.env to your .gitignore file to prevent accidentally committing your API keys to version control.
Webhook Setup (Optional)
Webhooks allow Dotclone to notify your server about events like call completion, transcription ready, or agent events. Here's how to set them up:
Create a Webhook Endpoint
Set up an endpoint on your server to receive webhook events.
# Python (Flask example)
from flask import Flask, request

app = Flask(__name__)

@app.route('/webhooks/dotclone', methods=['POST'])
def handle_webhook():
    event = request.json

    if event['type'] == 'call.completed':
        print(f"Call {event['data']['call_id']} completed!")
        # Handle call completion
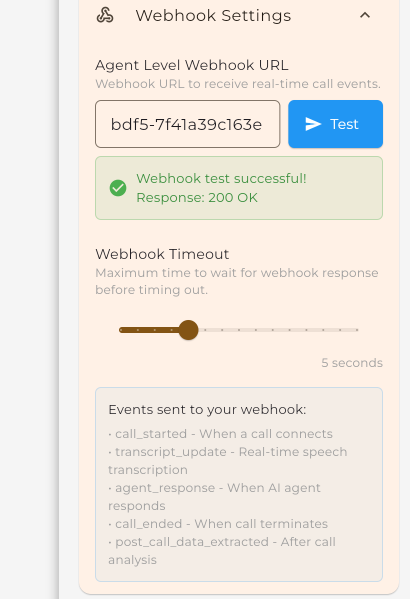
return {'status': 'ok'}, 200Register Your Webhook URL
Add your webhook URL in the Dotclone dashboard.
 Navigate to Settings → Webhooks
 Enter your webhook endpoint URL
Select Events to Listen For
Choose which events you want to receive.
call.started
When a call begins
call.completed
When a call ends
call.failed
When a call fails
transcription.ready
When transcription is available
agent.event
Custom agent events
sms.received
When an SMS is received
 Select the events you want to receive
Verify Your Installation
Run this quick test to make sure everything is set up correctly:
from dotclone import Dotclone

client = Dotclone()

# Test the connection
try:
    user = client.me()
    print(f"✓ Connected as: {user.email}")
    print(f"✓ Plan: {user.plan}")
    print(f"✓ Credits: {user.credits}")
except Exception as e:
    print(f"✗ Connection failed: {e}")
import Dotclone from 'dotclone';
const client = new Dotclone();
// Test the connection
try {
const user = await client.me();
console.log(`✓ Connected as: ${user.email}`);
console.log(`✓ Plan: ${user.plan}`);
console.log(`✓ Credits: ${user.credits}`);
} catch (error) {
console.log(`✗ Connection failed: ${error.message}`);
}curl -X GET "https://api.dotclone.com/v1/me" \
-H "Authorization: Bearer $DOTCLONE_API_KEY" \
-H "Content-Type: application/json"
# Expected response:
# {
# "id": "user_abc123",
# "email": "you@example.com",
# "plan": "pro",
# "credits": 24000
# }Troubleshooting
Running into issues? Here are some common problems and solutions:
"ModuleNotFoundError: No module named 'dotclone'"
The SDK isn't installed. Run:
pip install dotcloneMake sure you're using the correct Python environment.
"401 Unauthorized" or "Invalid API Key"
Your API key is missing or incorrect. Check:
- The key is correctly copied (no extra spaces)
- Environment variable is set:
echo $DOTCLONE_API_KEY - The key hasn't been revoked in your dashboard
"429 Too Many Requests"
You've hit the rate limit. Solutions:
- Add delays between requests
- Implement exponential backoff
- Upgrade to a higher plan for increased limits
Webhooks not receiving events
Check the following:
- Your endpoint is publicly accessible (not localhost)
- Firewall allows incoming POST requests
- Endpoint returns 200 status code
- Check webhook logs in your Dotclone dashboard
Still stuck? Ask in our community or contact support.
Next Steps
Now that you're set up, explore what you can build: