Command Center
Your AI Agent Dashboard
One place to create, organize, and deploy all your AI agents. Build voice agents, chat agents, or hybrid bots — then manage them all from a single, powerful dashboard.

One place to create, organize, and deploy all your AI agents. Build voice agents, chat agents, or hybrid bots — then manage them all from a single, powerful dashboard.
The Agent Dashboard is your command center for building and managing AI-powered voice and chat agents.
Build voice, chat, or hybrid agents using visual workflows or simple prompts
Import JSON workflows, export for backup, or share templates with your team
Find agents instantly by name, type, or date — sort any column with one click
Edit, duplicate, copy ID, or delete — all from a quick-access menu
Choose the right agent type for your use case — voice calls, text chat, or both.
Voice-only agents that handle inbound and outbound phone calls. Perfect for customer support hotlines, appointment scheduling, and lead qualification.
Text-based agents for websites, apps, and messaging platforms. Ideal for 24/7 support, FAQ automation, and lead capture forms.
Hybrid agents that handle both voice calls and text chat with the same knowledge base. One agent, multiple channels.
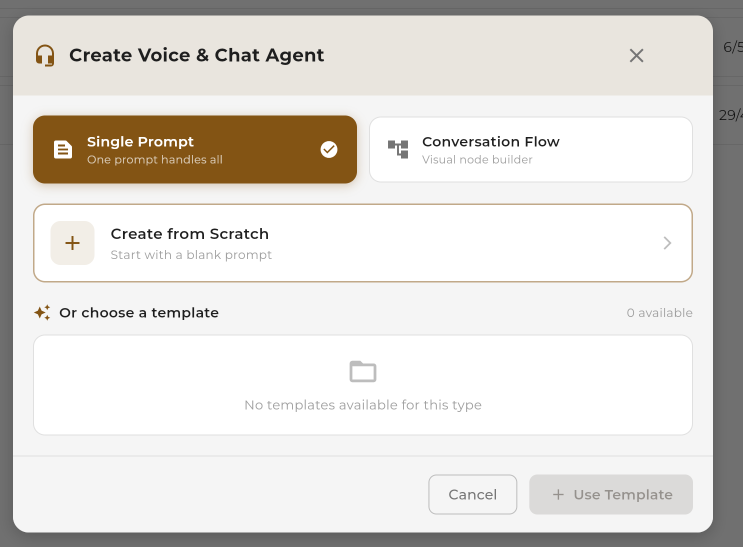
Choose the approach that fits your needs — visual control or quick setup.
Visual node-based builder for complex, multi-step conversations. Drag and drop nodes, connect paths, and control every step.
Write one system prompt and let AI handle the conversation flow. Quick to set up, natural conversations.
Get familiar with the agent management interface.
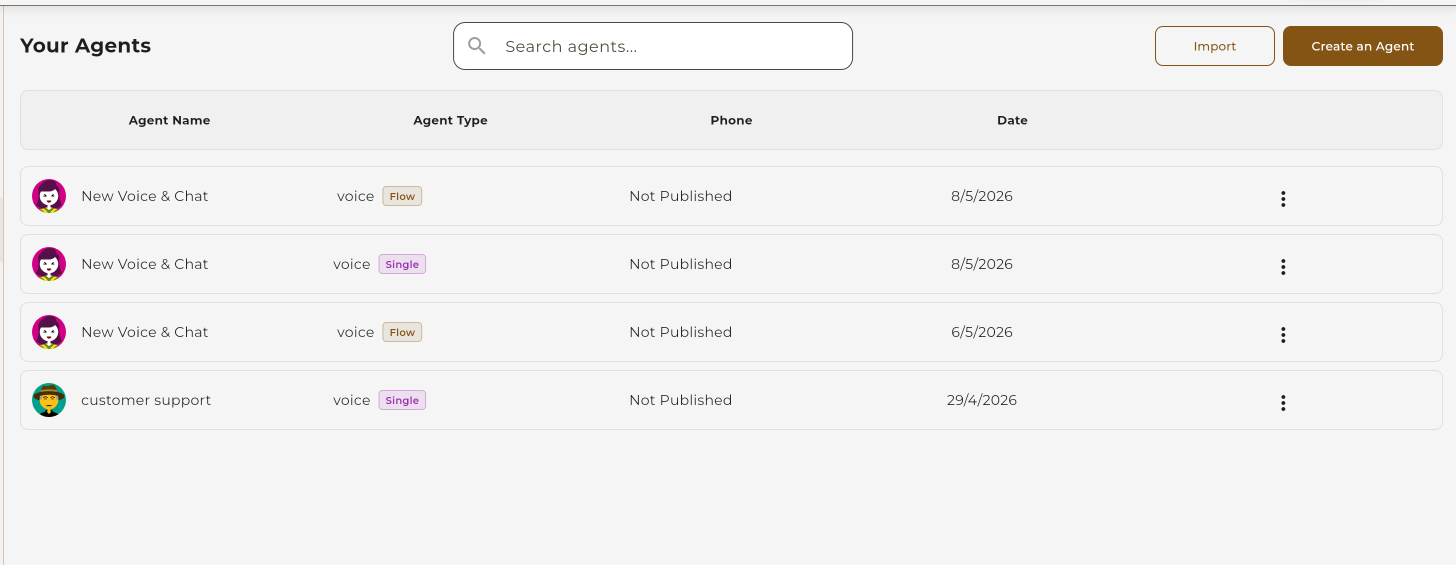
All your agents are displayed in a sortable, searchable table. Each row shows the agent name, type, workflow badge, connected phone number, and creation date.
Click "Create an Agent" to open the creation modal. Choose your agent type, workflow method, and optionally start from a template.
Click the three-dot menu on any agent row to access quick actions without opening the full editor.

Move workflows between accounts, create backups, or share templates with your team.
Upload a JSON file to create a new agent. The system validates the structure before importing.
Download any agent as a JSON file for backup, sharing, or migration to another account.
Real-world scenarios where the agent dashboard shines.
Create separate agents for sales, support, and scheduling — manage them all from one view.
Duplicate an agent, tweak the prompt or flow, and compare performance between versions.
Export workflows regularly to create backups. Restore instantly by importing the JSON file.
Share workflow templates across your team. One person builds, everyone benefits.
Keep development agents separate from live ones. Test changes before deploying.
Import pre-built templates to get started fast. Customize from a working baseline.